
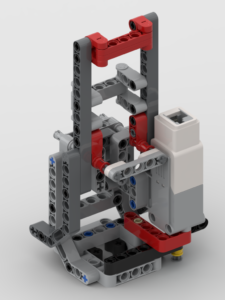
For some time now I’ve been using the excellent EV3DPrinter, designed by Marc-André Bazergui. The original information on this model can be found at https://www.instructables.com/id/NEW-EV3Dprinter/
To help rebuild his model, Baz had produced a 3D model made in LEGO Digital Designer. That software is almost, if not, obsolete so it’s not so easy now for others to rebuild his model. When I’ve shown it working at exhibitions there has been great interest from people about building their own copy of it – to which I’ve responded that I really ought to make a step-by-step PDF of it for others to follow. I have finally done that.
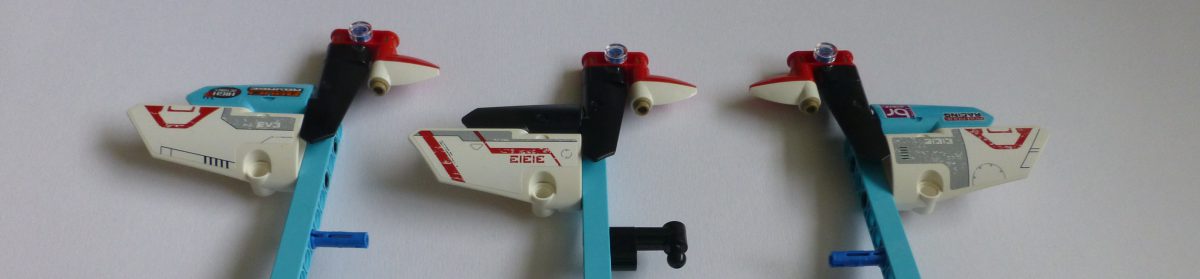
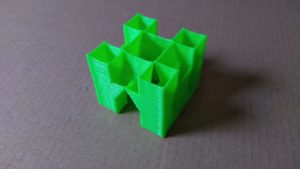
My build of the EV3DPrinter has been modified. A few sections of it have been altered, and other things have been moved around – e.g. the Y-axis touch sensor is in a different location. In addition to changes to the model I wrote all my own code from scratch, so my sensor and motor ports are different to the original. In addition I have made BIs for an additional pen-holder for a different type of 3D pen.
The BIs for the main model can be obtained from:
http://www.jander.me.uk/LEGO/resources/EV3DPrinter%20JN.pdf
The BIs for the Type 2 pen holder can be obtained from:
http://www.jander.me.uk/LEGO/resources/Pen%20Holder%20Type%202.pdf
The EV3g code can be obtained from:
http://www.jander.me.uk/LEGO/resources/EV3DPrinter_JN.ev3
Additional to the EV3 code you will need some data files for the 3D models, such as the letters or the castle:
These data files are in a zip file that will need to be extracted and all .rtf files downloaded into the EV3 in the same folder as the main code. This file can be obtained from:
http://www.jander.me.uk/LEGO/resources/EV3DPrinter_JN_Data.zip
There are several programs:
- Basket Body
- Basket Lid – These two combined make a small basket with fitting lid
- Tubes – A pair of intertwined tubes, a bit like Penne pasta 🙂
- Stars – Make various pointed stars / cones
- 3D model – choose a test, boat, castle, and the parts for the FLL logo
- Letters – a menu of letters, for which the height can be changed
When the program starts it will initialise the mechanism. Both the X-axis and Z-axis have adjustable axle stops. The X-axis stop may need to be adjusted to get the base plate central. The Z-axis stop will most definitely need to be adjusted to get the tip of the pen close to the plate. My advice, before starting any printing runs, to manually move the Z-axis elevator to get the pen to the correct height and then alter the sensor axle at the back so that the touch sensor is just pressed. This will ensure that when you start the program that the pen isn’t accidentally driven in to the plate, or that the pen is too high.
After initialising, the program will ask what type of pen is in use: “press and hold” or “on / off”. The original type of pen, as shown on Baz’s instructions, was a “press and hold” version. The 2nd type of pen I have, you press once to start and press again to stop. The program will need to know what style you’re using. The EV3 will remember your last choice and pre-select that at the start of each program.
This work is released under the Creative Commons Attribution-NonCommercial-ShareAlike 4.0 International licence.
Hi Jerry
Sorry to bother you.
I have built the 3dPrinter, how cool is that.
On experimenting with the printing I found that I could not print the 3d Models.
You seem to have miss places the modellist file.
Thought I would let you know in case some others are having a similar problem.
i managed to get 1 in the file and it works great, I can not get more in the file. what is the format of this file please. It may be the mac book when saving the file ie carrage returns or something.
Cheers
Darren
Hi Darren – yes, you’re right. I forgot to include that file. I’ve added the one I use, so if you re-download that zip file, you should be able to get it.
It’s not quite a line ending thing as such, but it’s close. Each entry in the file is separated by a, no . It’s the format used by the EV3. I tend to make a plain text list file then use “tr ‘\012’ ‘\015’ < file > file.rtf”.